V7 Go quick-start guide
In this guide we’ll run you through how you can quickly set up a project in Go. With a few minutes’ setup, you’ll be able to use GenAI models to instantly complete tasks that would have taken hours, days, and even weeks just a short while ago.
Create a project
Whenever creating a new V7 Go project, you have 4 options to help you get up to speed quickly:
- AskGo (Get AI to do the heavy lifting for you)
Click New project > Start from scratch and tell AskGo about the outcome you're trying to achieve

- Templates (Leverage our team's expertise to get started)
Click New project > Explore templates and find a suitable template that you can copy or use to get inspired for your own project
- Import CSV file (Reuse the structure and data from an existing sheet and add AI properties)
Click New project > Import CSV File. Go will recreate the file's structure in a new project so automation can be easily added to your existing data (read on for more info on adding AI properties).
- Start from Scratch (Roll up your sleeves and build something completely new)
Click New project > Start from scratch and read on to learn how to create your own V7 Go project.
Entities & Properties
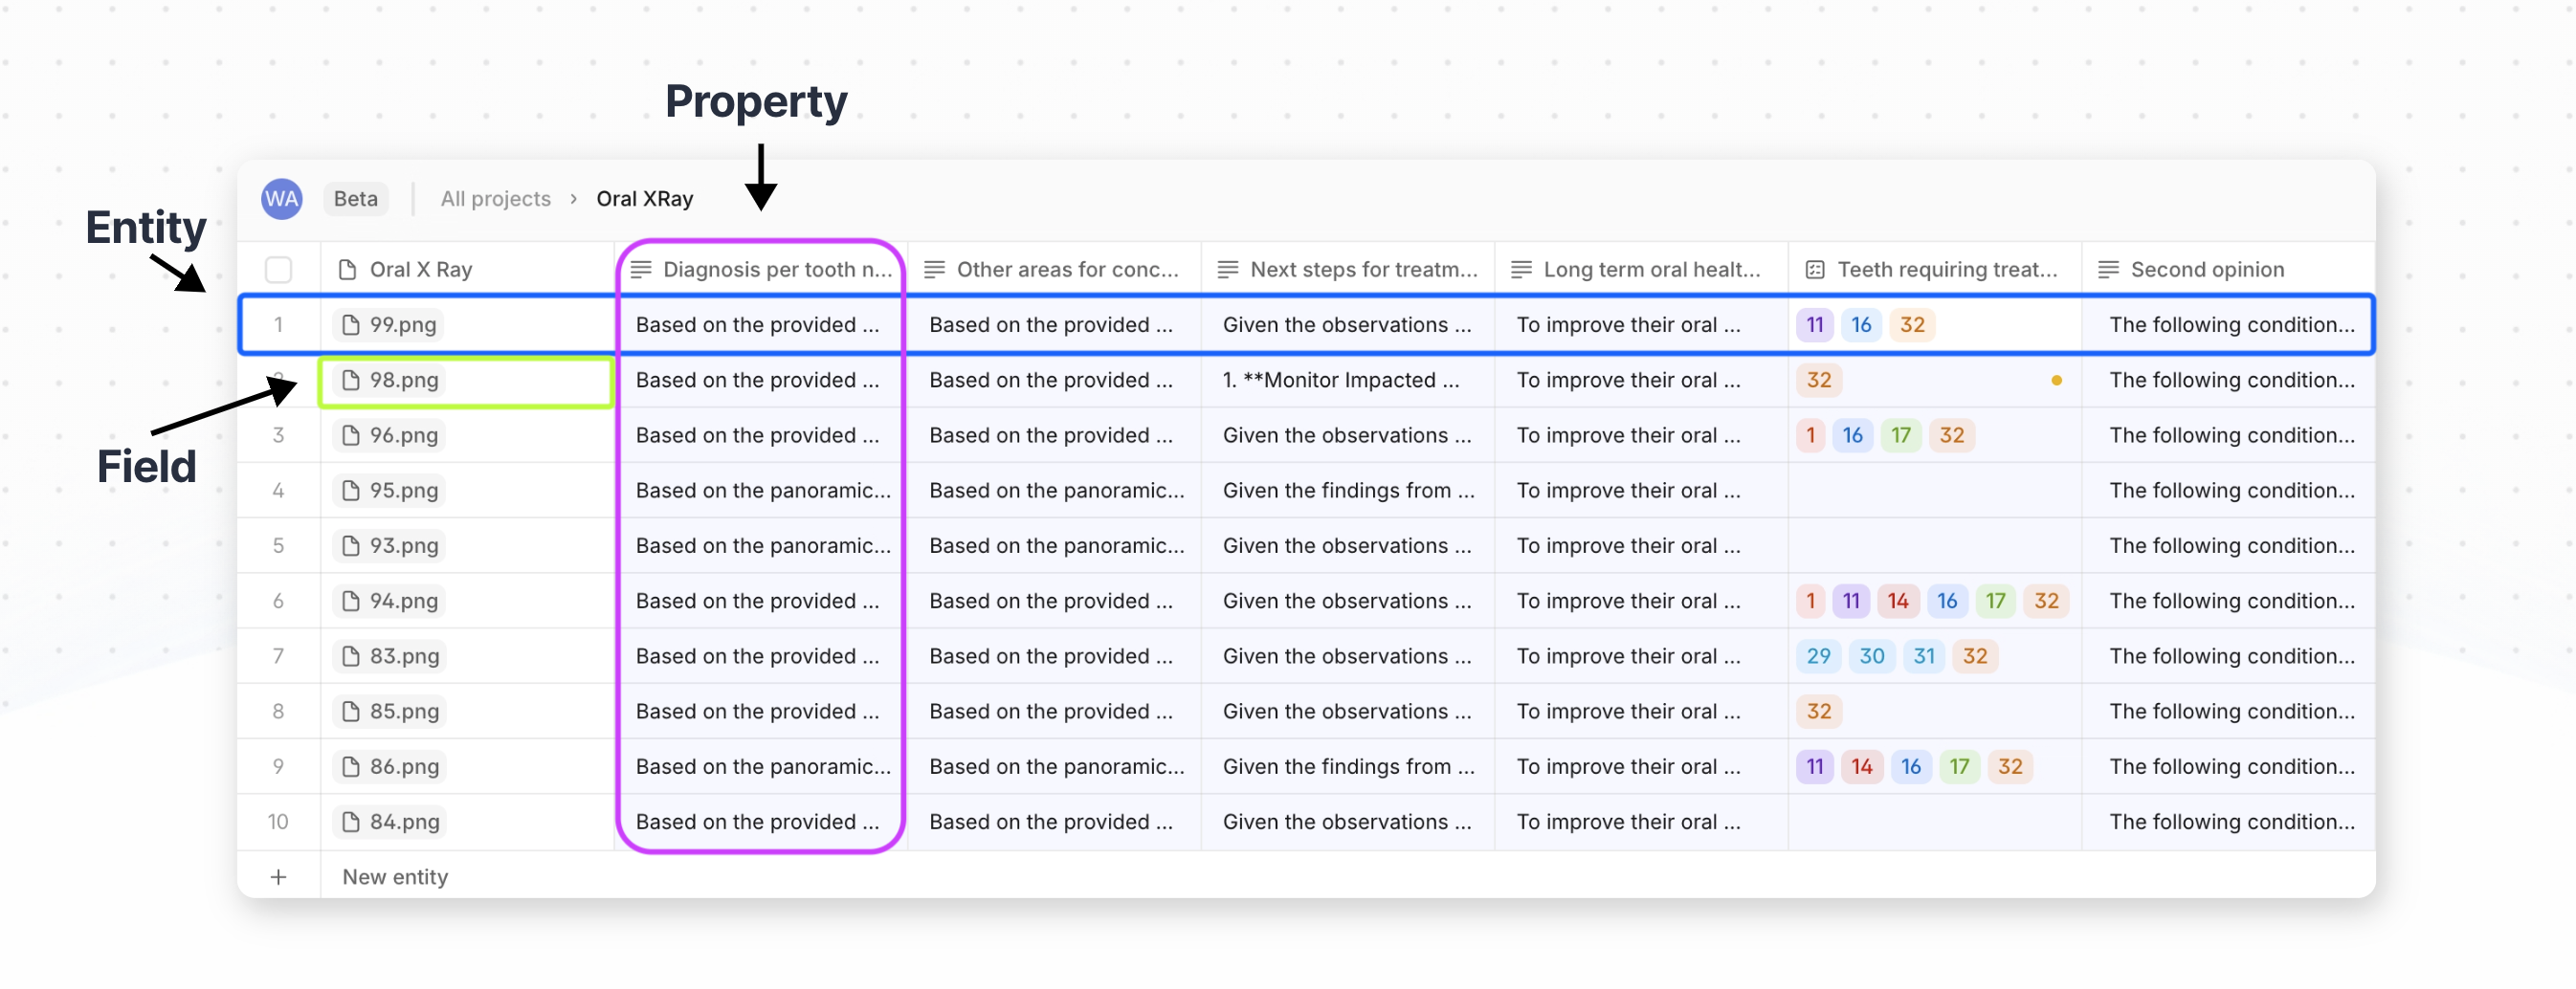
Go projects consist of Properties (columns), Entities (rows), and Fields (cells). AI Tools can be plugged into the properties of a project to extract and interact with data in one or more surrounding properties.
Fields contain the inputs used by the model or the model’s outputs, making an entity a collection of human and automated inputs and outputs.
Let’s walk through the process of creating a project using an KYC document categorization and extraction use case as an example:
Add properties
In this example, we have a collection of customer documents (Government-issued ID and Proof of address) that will be analyzed with AI Tools.
Let’s start by adding our first property. As with most V7 Go projects, the fields in the first property will contain the files that are going to be analyzed - In this case our customer documents.
To add a property:
- Select + at the top of the project page
- Name the property
- Select the property Type (in this case we’ll select File)
- Select the property Tool (we will be importing these files ourselves so in this case we’ll select User input)
- Select the property’s Inputs (the other properties that will be used as inputs in order to generate an output)
- If an AI Tool has been selected, set a prompt for the property
- If Select or Multi Select have been selected as Types add the pre-defined options that the tool will use as outputs
Our next property will categorize the files that are added to the File property, outputting these conditions as a single select option.
To do this, we’ll add a new property whose type is Single Select. We’ll use GPT 4o as our tool and the File property that we created previously as our input.

Prompting
Using a model to produce a text or JSON output will typically require a well-engineered prompt (check out our prompting best practices guide here for help creating useful prompts).
When using a single or multi-select property, however, the selected AI tool will be able to use the name of the property and the select options provided to infer what the output should be for most basic tasks. Use the prompt field to add accuracy as needed.
Once we've added a single-select property, we can use workflows to send entities to specific tasks depending on how they are categorised.
Navigate to a specific workflow stage at the bottom of the page.

And add new properties or reveal existing properties from other stages
In this example, we'll add one final stage: a JSON property that extracts passport information:
Once all properties are saved, any properties that have an AI tool and input selected will automatically run when a field in the input is updated.
Import data
Files can be imported in the UI by selecting a field whose type is PDF or File and using browse or drag & drop to add files to the project. Go will automatically create new entities for each file that is added.
To create automated pipelines to import data to Go, check out our Zapier guide. If you know your way around an API, you can also use our API or webhooks to get data in and out of V7 scaleably.
Entity View
Once data has been added to a project, users can use the Entity view to expand an individual entity and review its fields.
Drag and drop the fields within the entity view and select the lock icon to prevent further edits.
Select ↑ and ↓ to navigate between entities and x to return to the project view.
Export Data
You can generate a .csv export a project manually by selecting Export datain the top right of the page.

Or you can also generate exports programatically using Zapier or our Go's API.
Updated 2 days ago